Managing Audits
- Tristan Mohn (Deactivated)
- Victoria Buhler (Deactivated)
- Shelley Fluke (Deactivated)
Overview
To enhance visibility into your compliance position, the Audits interface provides easy-to-view graphics displaying the status of each audit. In addition, you can access comprehensive lists of assessments, requests and issues within your instance, regardless of audit.
While the Audits module offers much of the information you need directly on the home page, there are additional metrics to view and edit when you click into the individual audit on the Audit summary page. From the summary page, you can conduct the following actions:
- View audit controls and the evidence requests surrounding them.
- Track which requests are submitted, overdue, or complete.
- Access and create any issues that stem from the audit.
- Export information in a CSV or PDF file.

NOTE
For instructions on how to access the Audits module and the Audits summary page, please see Introduction to Audits.
Audits Display Overview
The main Audits page displays all audits with immediate views of controls, requests and issues. After clicking into a specific audit, the Audits summary page displays similar elements, but provides only one audit on the page. 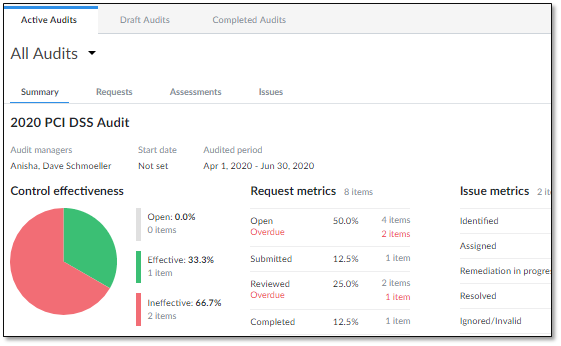
Audits Tabs
There are four tabs for each audit as follows: Summary, Requests, Assessments, Issues.
There are some important differences between the Summary tab and the Assessments tab that merit explanation:
- Summary (with the Pie chart) - This is the initial view that displays control effectiveness, which is health on the control-level.
A single control in an audit might have more than one assessment mapped to it. By design, if any of these assessments are ineffective, then the control itself is deemed ineffective. - Assessments - This tab allows you to visualize and drill into the assessments to determine where corrective action needs to be taken.
Since more than one assessment can be mapped to a single control, the distinction is that the number of items on the Summary pie chart may NOT equal the number of assessments on the Assessments tab.
Editing and Adding Information to an Audit
Most of the details selected in the creation of an audit can be edited once it's activated. Details that can be edited include information such as audit type, reporting period open and close dates, evidence folder destination, audit description, audit manager and object mapping. However, changing an audit type from internal to external cannot be made after the audit is saved in Step 1 of audit creation.
View and Edit Audit Details
To access and edit the Audit details page from the Audit summary page, complete the following:
- Click Actions | View audit details.
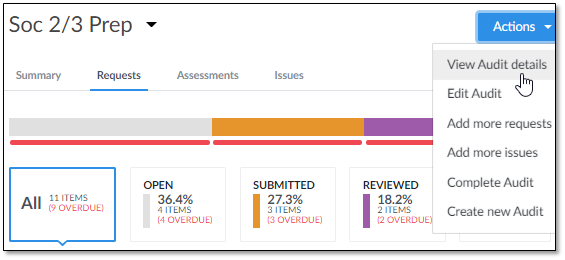
The audit details page displays. You can now edit the majority of fields in the audit set up. This is the view displayed when an audit is accessed by clicking System of Record | Audits.

NOTE
Editing on a details page is consistent across the application. For additional information, please see Actions on the Details Page.
Edit Audit Setup and Storage
To access and edit information provided during audit setup, complete the following steps:
- Click Actions | Edit Audit.
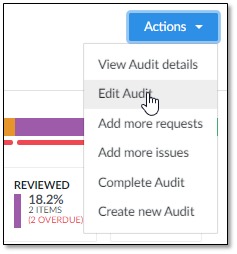
The first step in creating an audit displays. You will be able to alter the majority of information added at the first step of audit creation, including audit managers, external auditors and evidence storage. See the next section for adding requests, controls and assessments.
NOTE
For information about the audit steps, please see Creating an Audit.
Adding Requests, Controls and Assessments after Starting an Audit
Controls and requests can be added after an audit has been started. However, assessments are not automatically created. You will need to manually create assessments, and make sure to select the pertinent audit and control during creation.
To add a control, complete the following steps:
Complete the steps under Edit Audit Setup and Storage.
Click 2. Scope to add controls or 3. Requests to add or create requests. Utilize the filters to find the items you want.
TIP
When adding controls, copy and paste the control names onto a clipboard so you can easily find them when creating the associated assessments.
- Click Next until the 5. Review step.
- Click Save & Close.
Any request or control will now be included in the audit. However, no assessments are generated for these controls.
To add an assessment, complete the following steps:
- In the upper, left corner, click New | Assessment.
- Complete all necessary fields.
- In the Audit, select the audit where the new control was added.
- In the Control field, click the dropdown to select the control, or paste in the name you copied when adding it to the audit.
- Click Save.
Exporting from Audits
Assessments, requests and issues can be exported directly from the audit in which they are assigned. Each object is exported separately, but they all share common steps.
TIP
To export a columnar list of data, including names and links to attachments, export information via the Export CSV button. This does not include the attached documents themselves. To include the attached files, export information via the Download Zip button.
To export information for individual objects associated with an audit, complete the following steps:
- Click the desired audit on the Audits page.
- Click the Assessments, Requests or Issues tab.

On the displayed page, select headings for data to export. The export only contains information for headings shown.
NOTE
For instructions on adding or removing headings for data export, please see System of Record List Views.
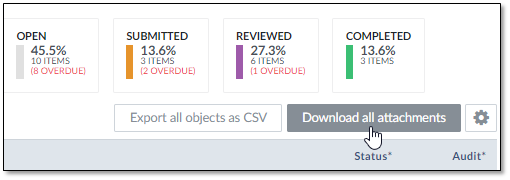
- Click Export all Objects as CSV. The CSV file downloads in the manner specified in your browser.
- Alternatively, click Download All Attachments. The zip file downloads in the manner specified in your browser and includes all attachments added to the object.
Displaying All Assessments, Requests or Issues
TIP
Jira audit requests do not display in the overall results when the Requests tab is clicked.
To display all assessments, requests or issues in the application, regardless of audit, complete the following steps:
- Access the Audits module but do not select an audit. Leave the selection on All Audits.

- Click the tab for the list you want to see.
- Depending on the link clicked, all assessments, requests or issues display for all active audits.
Viewing Overdue Items
The application displays the Due On date in red if an item is not in a completed status by the time it's due.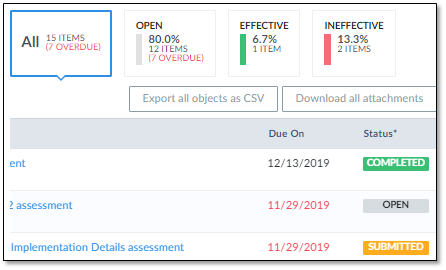
Exporting All Assessments, Requests or Issues
NOTE
Prior to these instructions, access the chosen object by following instructions in Displaying All Assessments, Requests or Issues.
To export all assessments, requests or issues in the application, regardless of audit, complete the following steps:
After selecting the object to export on All Audits, select headings for data you want to export. The export will only contain information for headings shown.
NOTE
For instructions on adding or removing headings for data export, please see System of Record List Views.
- Click Export all Objects as CSV. The CSV file downloads in the manner specified in your browser.

Alternatively, click Download all Attachments. The zip file downloads in the manner specified in your browser and includes all attachments added to the object.
Viewing Individual Requests, Assessments or Issues
To open an assessment, request or issue, complete the following steps:
- Click the desired tab in the audit.

- Click a linked item in the Title column.

- The page displays.
NOTE
For instructions on completing an item to which you're assigned, please see Working with Assessments, Working with Requests, and Working with Issues
Completing Audits
An audit can be set to a complete status at any point. This removes it from the Active Audits tab and places it under the Completed Audits tab.
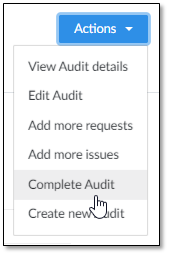
To complete an audit from the Audit summary page, complete the following steps:
- Click Actions | Complete Audit.
Reopening Audits
A completed audit can be opened again. This removes it from the Completed Audits tab and places it under the Active Audits tab.
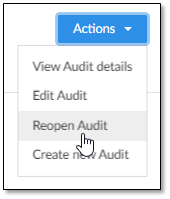
To open a completed audit from the Audit summary page, complete the following steps:
- Click Actions | Reopen Audit.
Deleting Audits
An audit can be deleted at any point. Once it's deleted, it cannot be recovered.
The following information outlines how the deletion works with other items in ZenGRC:
- When an item is deleted, the mapped objects are not deleted; only the mappings are.
- If something is deleted by accident and it needs to be restored, please submit a support request to support@reciprocitylabs.com requesting a restore and giving the time (including timezone) at which the erroneous deletion was performed. We take backup snapshots every four hours so we will provide the time of the most recent snapshot that precedes the deletion.
- When an audit is deleted, evidence stored in your own storage solutions is not deleted. However, the links to the documents are removed. This can require significant engineering effort to restore the items.
To delete an audit from the Audit summary page, complete the following steps:
- Click Actions | View audit details.
- The Audit details page displays.
- At the top of the page, click Actions | Delete.

- The Delete dialog box displays.
- Select the checkbox next to Audit will be deleted to activate the Delete button.

- Click Delete.
- Alternatively, click Cancel to return to the Audit details page without deleting.
© 2021 Copyright Reciprocity, Inc.
https://reciprocity.com