Splunk Connector
- Tristan Mohn (Deactivated)
- Victoria Buhler (Deactivated)
- Alejandro Ricatti (Deactivated)
- Daniel de Juan (Deactivated)
Overview
The Splunk connector for ZenGRC provides an integration that allows you to easily pull audit evidence from Splunk into ZenGRC. With the push of a button, evidence “fetchers” reach out to Splunk and pull evidence data into ZenGRC. You can define evidence fetchers in ZenGRC from any saved report that you’ve created in Splunk, providing endless flexibility in the kinds of evidence you want to source!
Requirements
Splunk Platform Requirements
- Splunk Enterprise version 7.2.7 or later, or
- Splunk Cloud version 7.0.2.1 or later
Network Access Requirements (only for Splunk Enterprise)
- ZenGRC requires the ability to connect to the Splunk instance on port 443. Customers should whitelist ZenGRC IP addresses to ensure connectivity. For instructions, please see IP Whitelisting
- An encrypted connection is established using TLS, and data that flows between ZenGRC and Splunk is encrypted.
- Note: For Splunk Cloud, no IP whitelisting is necessary.
Authentication
- ZenGRC supports authentication with a Splunk username and password.
- For Splunk Enterprise, any named user in the Splunk instance can be used to authenticate the integration. The user's permissions in Splunk determine what specific Splunk data the integration can access.
- For Splunk Cloud, a special API user is required. If no such user exists in your Splunk Cloud instance, you can request one by submitting a case to Splunk Support.
- ZenGRC encrypts the password and stores it in the ZenGRC database.
Permissions
Splunk allows the user to configure roles with varying levels of permissions. Every app and object within Splunk is governed by a set of read/write permissions that specify what users can see (read access) and interact with (write access). Permissions can be granted by role for every application and object.
The Splunk role with which you configure the connection should be one that only allows the ZenGRC user to read necessary objects. What these objects are should be determined by the customer, but generally encompass any data that an audit may require.
Setting the Connection
This activity requires administrative privileges.
NOTE
To access connectors, please see Introduction to ZenConnect.
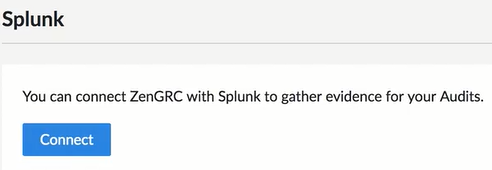
- On the Splunk page, click Connect.
- On the resulting screen, enter your organization’s Splunk instance API URL in Splunk instance URL.
- For Splunk Cloud - Managed Splunk Cloud deployments, append ":8089" to the end of your instance's base URL (Example: https://[yourdomain].splunkcloud.com:8089)
- For Splunk Cloud - Self-service Splunk Cloud deployments, append "api-" to the beginning of your instance's base URL, and append ":8089" to the end of your instance's base URL (Example: https://api-[yourdomain].splunkcloud.com:8089)
For Splunk Enterprise, append "-api" to the and of your instance's base URL. (Example: https://[yourdomain]-api.zengrc.com/)
- Enter the email address (or username) and password in the Splunk email / username.
- Click Next.
Adding a Fetcher
Any information to be attached to controls or requests needs to be pulled, or fetched, on this interface. Those who have edit permissions on a control, or who have administrative privileges, can add fetchers.
TIP
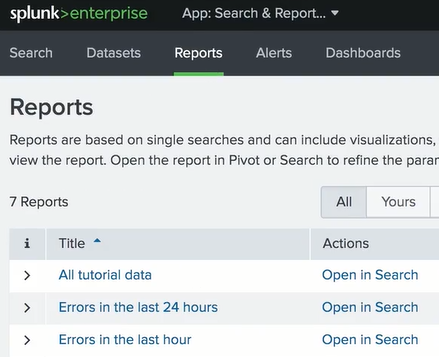
The list of fetchers is based on the reports saved by the Splunk role used to set the connection. If you query a report with a user other than the one provided for the integration, you may see different results.
TIP
The maximum file size for each attachment that a fetcher can pull from Splunk is currently limited to 85 MB.
To add a new fetcher, complete the following steps:
- After setting the connection at Settings | Splunk additional options display on that page to create a new fetcher.
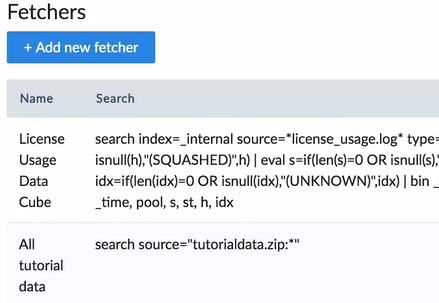
- Click +Add new fetcher.
- Click Use a saved search dropdown to display searches in Splunk.
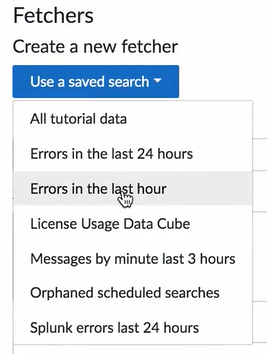
- Selecting a search populates the form with information from Splunk.
- Continue adding new fetchers as needed.
Adding Evidence Fetchers to Controls and Requests
After a fetcher pulls data into ZenGRC, the information must be attached and mapped to a control. Then it can be added to a request.
In addition, the collected data is provided as CSV files. If the Splunk report does not bring any results for its query, these files may be empty.
Once the connection is established, these videos demonstrate how to add fetchers - ZenGRC Splunk Demonstrations. Or review information in the following documentation - Working with Fetchers, Controls, and Requests.
© 2021 Copyright Reciprocity, Inc.
https://reciprocity.com