Live Search spaceKey ZenGRCOnboardingGuide additional none placeholder Search our site type page
Overview
The ZenGRC Jira Connector allows you to view Jira Software information from within ZenGRC. In particular, you can create audits where request details can be updated and tracked in both Jira and ZenGRC.
| Note | ||
|---|---|---|
| ||
If your organization uses the self-hosted version of Jira Software Server, please follow the instructions under Configuring ZenGRC with Jira Software Server |
| Anchor | ||||
|---|---|---|---|---|
|
This documentation is for configuring Jira projects that are linked to ZenGRC, as well as for setting up the Jira user who is added to the Jira Settings page within ZenGRC.
| Tip | ||
|---|---|---|
| ||
It is the permissions within Jira Software that impact the access between Jira and ZenGRC. If there are issues between the two applications, please check Jira settings. |
Creating or Verifying a Jira User
This user must have an API token and use that instead of a password. For more information about tokens, please read the Atlassian Cloud documentation on API tokens.
- From the Atlassian admin console, create a new user or verify the existence of the user that will be used to establish the ZenGRC connection. Be sure to use the API token instead of a password.
- Alternately, if you're using a Lightweight Directory Access Protocol (LDAP), then create the user in that directory and sync it with Jira.
Configuring Permissions
In each of the Jira projects that will be used for ZenGRC, complete the following in the Permissions area:
- Create Issues - Enable this section so the user can create issues within Jira. If not, ZenGRC won't be able to send requests or tasks into the Jira project.
- Browse Projects - This should be enabled only for the projects that will be used for ZenGRC.
- Create Attachments - This should be enabled in order to attach evidence.
| Info | ||
|---|---|---|
| ||
For additional information on permissions, please read the Atlassian Cloud documentation on Managing Project Permissions |
Testing the User
- Log into your Jira project as the user just created in the Creating or Verifying a Jira User.
- Review content to double-check what the user can see and do. This is then what ZenGRC will be able to access/see in Jira.
Anchor settingtheconnection settingtheconnection
Setting the Connection
| settingtheconnection | |
| settingtheconnection |
To set up the connection in ZenGRC
After accessing the connector, complete the following steps :Include Page DI:NOTE - How to access connectors DI:NOTE - How to access connectors

Enter
to set up the connection:
- On the Jira Settings page, enter the following information:
Jira instance URL - Add the link to your Jira instance.
Tip title TIP The URL to your Jira application should look similar to this example: https://[your-jira-domain].atlassian.net/. Make sure to include the full address, including the https://.
- Jira email / username - Add the user email address or username who is set up with access to Jira and ZenGRC. To set this user up in Jira, follow instructions under Configuring Jira Software Cloud.
Jira password / API token - Add the API token used to access the Jira instance.
Info title NOTE The user must have an API token and use that instead of a password. For more information about tokens, please read the Atlassian Cloud documentation on API tokens.
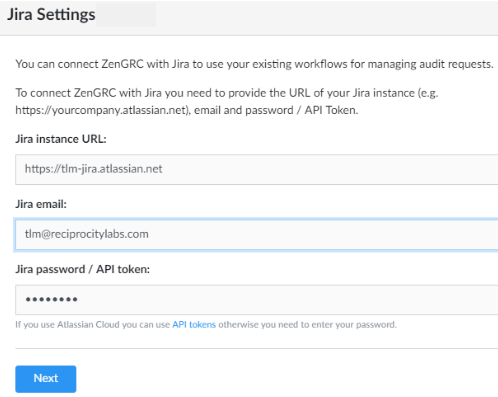
Click Next
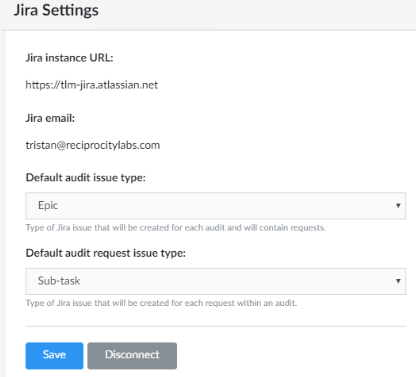
- The Jira Settings page displays. For information on the selection of issues and requests, please read the Atlassian Cloud documentation on Epics, stories, versions, and sprints.
- After making selections, click Save. You will then have the option to select whether a new audit can be managed in ZenGRC or in Jira.
| Info | ||
|---|---|---|
| ||
Continue to the next section - Creating a Jira Audit. |