| Live Search | ||||
|---|---|---|---|---|
|
Benefits
ZenGRC's API keys allow you to query ZenGRC and return objects along with attributes important to your organization. This data can be fed into a third-party tool for business intelligence reporting or workflow integrations.
| Note | ||
|---|---|---|
| ||
All available endpoints are listed on the general API Reciprocity website at https://docs.api.zengrc.com/. Full developer instructions are also a part of your organization's ZenGRC instance, which is configured as follows: for US customers: https://[yourinstance].api.zengrc.com for EU customers: https://[yourinstance].api-eu.zengrc.com |
Overview
Using API keys, you can easily pull data from your instance and manipulate reports important to your organization. API keys create authentication separate from username/passwords and work in a setting where other user authentication mechanisms are used (e.g., SAML-SSO, Google Login). They also add an additional layer of security for your account and can be assigned specific permissions for access.
Starting the Process
To create an API key and retrieve data, there are actions to take on two separate websites. Those actions include the following:
- Generate the API key ID and key secret in your ZenGRC instance.
Access your organization's API website to add the keys and retrieve code.
Anchor generatekey generatekey
Generate the Key ID and Key Secret
| generatekey | |
| generatekey |
| Tip | ||
|---|---|---|
| ||
Only users with administrative access to ZenGRC are able to generate keys. The keys share all rights of the user who creates them and can be used for other integrations, such as Tableau. |
In your ZenGRC instance, complete the following steps:
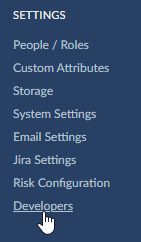
- Click Settings | Developers.
- Click Create new.
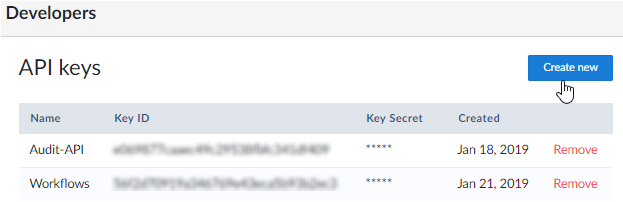
- Add a name in the API key name field.
- Click Create.

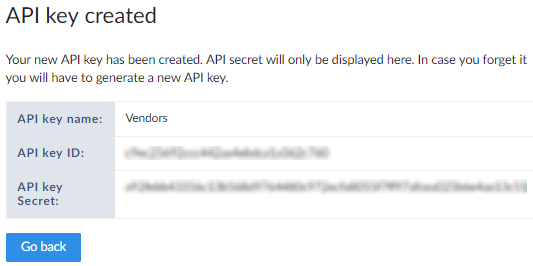
Copy information in the API key ID and the API key Secret fields.
Note title IMPORTANT This is the only time the ID and secret are displayed. If you navigate away without copying them, you will need to generate a new key.
Access Your ZenGRC API
After generating an ID and secret, open a new browser window for your organization's API website, which has a URL configured as follows: https://[yourdomain].api.zengrc.com. This is a web view into the API, where you can authorize to test if you like, but its not necessary to use the API. You could also query the API directly by logging in with the ID and secret without going thru the webform.
To authorize, complete the following steps:
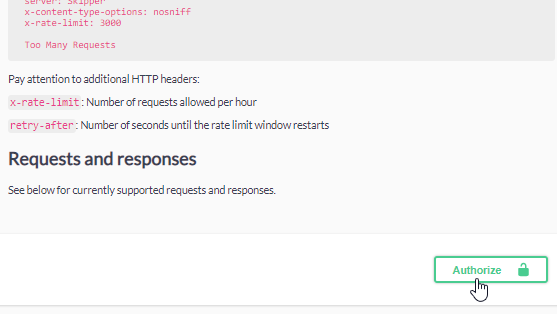
Scroll down and click Authorize. This opens a dialog box on top of the page where the API keys you generated are added.
Tip title TIP Instead of clicking Authorize, you can follow the instructions on the page for creating an authorization header.
- Copy information from the API key ID into the Username field.
- Copy information from the API key Secret into the Password field.
- Click Authorize.
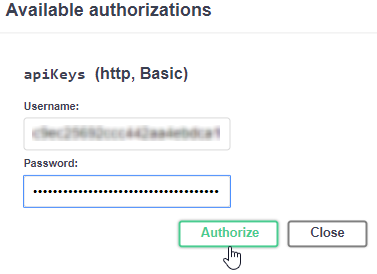
- Click Close.
- The APIs made available for ZenGRC are located below the Authorize button.
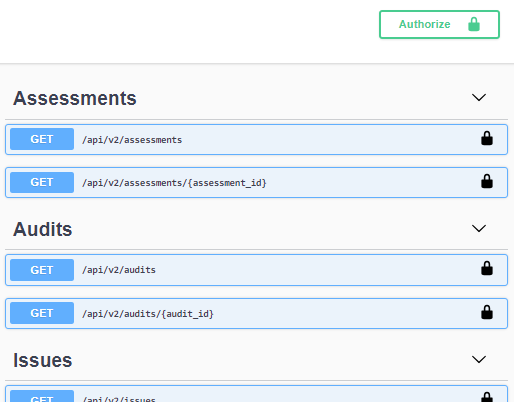
- The Models section displays responses for each of the requests.

Use the API
Once you have created an API key and authenticated it at https://[yourdomain].api.zengrc.com, please follow the developer instructions listed on that site. It reviews the following:
- Rate limiting.
- Requests and responses (supported objects).
- Model examples.
- Paged data.
Swagger / OpenAPI Specification
ZenAPI provides Swagger / OpenAPI specification version 3 accessible on our API documentation page:
https://docs.api.zengrc.com/api/v2/swagger-v3.json or https://docs.api.zengrc.com/api/v2/swagger-v3.yaml